6. Scripting
The Vortex OpenSplice Tester provides automatic testing capabilities by means of scripting. This section describes the features of Tester’s built-in scripting instructions, and how to install additional script engines.
6.1. The Script Language
The script language as used by the Tester is specifically designed to create readable and easily maintainable scripts.
Instructions are simple, with named parameters which enable the Tester to limit the
testing to the fields applicable to the test. For example, the send instruction
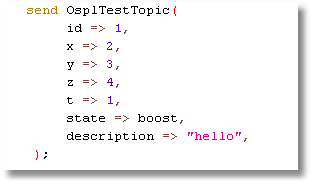
is an instruction which sends a topic. The basic syntax is the keyword send
followed by the topicname and a list of named parameters between parentheses
(‘round brackets’), terminated with a semicolon.
Illustrating send keyword syntax
The check instruction is similar to the send instruction; it has options
to find a specific instance using key fields or a query.
Illustrating check keyword syntax
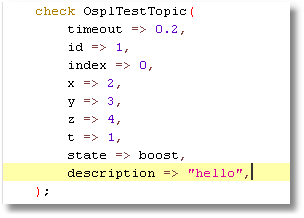
In this example a timeout is set, which will allow a wait of up to 0.2 seconds
for the topic sample for the correct instance to arrive.
6.1.1. A script file
A scenario has the following format:
Illustrating scenario keyword syntax
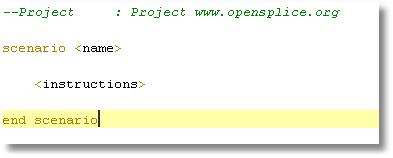
The name is for information only, and is not used further.
6.1.2. Variables
The script language allows the use of variables. Variables can be used to store
values that can then be used at a later time. A variable is indicated by either
a << or a >> prefix. Variables may be declared implicitly, or explicitly
using the var instruction.
Example variable
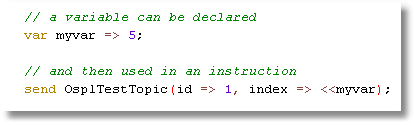
In this example the variable myvar is declared and initialized with the
value 5. Within the send instruction the variable is used to provide
the value for the field index. The << prefix indicates the direction of
the assignment from the variable to the field.
Variable with >> prefix
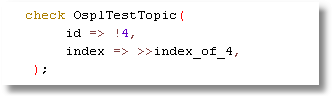
Here the variable index_of_4 is declared implicitly and the value of the
field index is copied to the variable (the prefix >> points to the variable).
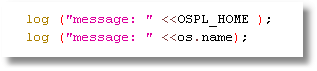
All environment variables and java virtual machine (JVM) properties are also available as variables, and they can be used as shown below:
Using environment variables
6.1.2.1. Special variables
There are some special variables which can be useful in scripts.
curtime_secandcurtime_nsecprovide the second and nanosecond parts of the current time.uniqidprovides a unique number for every call, within the same session of the Tester.script_fileandscript_pathprovide the scenario file name and the scenario file’s path respectively. If the currently executing scenario context changes because of acallinstruction to another scenario or macro file, using these variables in the called scenario or macro will reflect the respective path and file name of the called script.
Note that these special values are used without the << prefix.
6.1.3. Embedded Scripts
Inside a scenario any script compatible with the java ScriptEngineFactory
can be used to provide calculated values for fields in a send,
check or var instruction, or as a stand-alone statement.
Embedded javascript
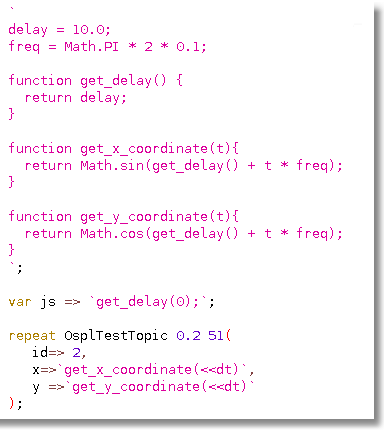
Stand-alone scripts must be enclosed by left single quotes, and then followed by a semi-colon.
Variables used in the javascript are translated before the evaluation of the script.
In this specific case the <<dt is the delta time in the repeat function.
All javascript in one scenario is executed in the same scope, and functions and
variables declared at the beginning of a script are available later in the script.
A specific script language can be selected by providing the name of the script
language in the first line of the embedded script: #!<language>, for example
#!js. Note that the language description must not be followed by any other text.
See section 5.6, Installing Script Engines, on page 85, for instructions on
installing a scripting language for use with the OpenSplice Tester. If no language
descriptor is provided on the first line of a script, the default language is
used as set in Preferences.
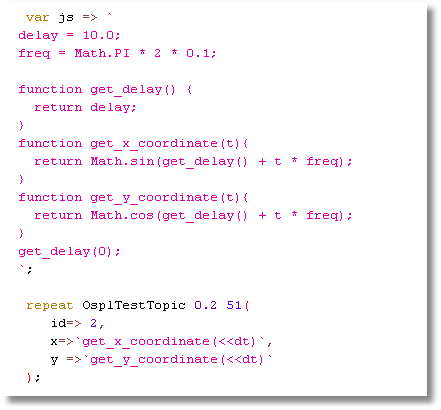
More embedded javascript
6.1.4. Comments
Comments can have the following formats:
Format of comments
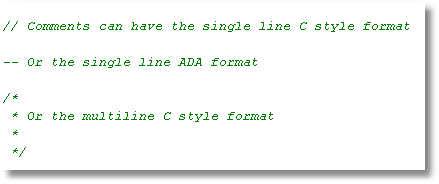
Within the scenario editor, comments are displayed in green.
6.1.5. Macros
For repeated scenarios a repetitive part can be split off into a separate script file called a macro. Macros can have parameters.
Calling a macro with parameters
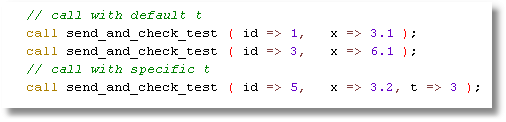
Similarly to send and check instructions, values for fields can
be optional. However, in a macro a default value must be provided for
a parameter to be optional.
Setting a default value for a macro parameter
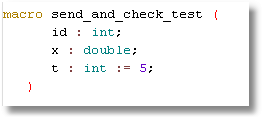
In this case t is optional, id and x are mandatory.
It is possible to call a scenario using the call instruction.
Scenarios do not have parameters.
6.2. The Instructions
6.2.1. Send
Instruction to publish a sample of a topic.
send <readername> ( [fieldname => value,]*);
The send instruction may include an ‘update parameter’. The update
parameter name is a combination of the topic name, followed by an underscore
(_) and the literal text ‘update’. Valid values for the update parameter are
true and false. The update parameter allows scenario scripts to send
a series of samples that evolve, each from the previous one, without having
to explicitly specify all field values in each send instruction.
If the update parameter is present, then the sample data sent is retained
by the topic reader, associated with the topic key field value(s). A subsequent
send instruction, including the update parameter set to true with
the same topic key field value(s), will have its sample initialized from the
retained values, if they exist. The sent sample with then replace the retained
values.
A send instruction including the update parameter set to false with
the same topic key field value(s) will be initialized from the topic defaults,
but the sent sample will be retained.
A send instruction without the update parameter will be initialized from
the topic defaults, and any retained value for the key field value(s) will
be removed.
Disposing the topic reader will remove all retained values.
6.2.2. Dispose
Instruction to dispose an instance of a topic.
dispose <readername> ( [fieldname => value,]*);
6.2.3. Writedispose
Instruction to write dispose an instance of a topic.
writedispose <readername> ( [fieldname => value,]*);
6.2.4. Check
Instruction to check a sample of a topic.
check[_last | _any] | recheck_last <readername> ( [timeout =>
<timeout in seconds>,] [<fieldname> => [!]<value>[:deviation],]*);
A timeout value can be provided allowing the check to wait for <timeout
in seconds> for the sample to arrive. If a sample meeting the criteria
of the check is available either directly or within timeout seconds the
fields as provided in the parameter list will be verified for correctness.
When the value of a field is an output variable:
>><varname>
Then the value will not be checked but entered in the variable with the
name <varname>.
There are two special fields, topicReceived and topicDisposed,
which when used will provide a true or false value into a variable.
When no sample is found which meets the criteria of the check then
topicReceived will be set to false (and the check instruction will
not fail); if a sample is received the value will be set to true. When
a field topicDisposed is found, then the variable will be set to true
if the sample was disposed and false if the sample was not disposed.
In this case no fail is reported upon a check instruction
when the checked sample was disposed.
The value can be given a possible deviation in the form <value>:<allowed
deviation>. In this case when the value for the field in the received
sample is within the range from value minus allowed_deviation
to value plus allowed_deviation, the value is considered correct.
The sample which matches the check can be determined in several ways:
The topic does not have a keyfield(s) or the topic has keyfield(s) but no value is provided for all keyfield(s). In this case the oldest not checked or marked sample is checked.
The topic has keyfield(s) and the check provides a value for all keyfield(s). In this case the last sample with the key is checked, so long as it was not previously checked. If no matching sample (within the possible timeout) is found then the check fails.
One or more fields of the check are marked as a query by prefixing the value with a
‘!’. The oldest not checked or marked sample which matches the query is checked. If no matching sample is found (within the possible timeout) the check fails.Instead of
check, the commandcheck_lastis used. In this case (as for situations 1 and 3) the last not-previously-checked sample matching the criteria is checked.Instead of
check, the commandcheck_anyis used. In this case also previously-checked or marked samples are considered.The command
recheck_lastwill always check the last sample matching the criteria, regardless of whether it has previously been checked or not.
6.2.5. Miss
Instruction to check that no sample of a topic was received since the last
checked or marked sample for the given key/query. The same rules apply as
for the check instruction with respect to finding (or not) the matching
topic sample.
miss <topicname> ([timeout => <timeout_in_seconds>,] [<fieldname>
=> [!]<value>[:<deviation>],]*);
6.2.6. Disposed
Instruction to check that an instance of a topic is disposed for the given key/query.
The same rules apply as for the check instruction with respect to finding the
disposed instance. Note that field values are only provided to find a specific instance
(either by key or by query) and not verified for values as part of this instruction.
disposed <topicname> ([timeout => <timeout_in_seconds>,]
[<fieldname> => [!]<value>,]*);
6.2.7. Mark
Mark all samples (with the given key/query) as read. Any regular miss/check
function will not ‘see’ topic samples received before the mark instruction.
If no key or query is provided all samples will be marked as read (and therefore
not considered for check or check_last instructions). If a key value
or query is provided, all samples matching the key/query will be marked as read.
mark <topicname> ( [fieldname => value,]*);
6.2.8. Repeat
Instruction to repeatedly send a topic for a specified count or until disposed.
repeat <topicname> <period> <count> ( [fieldname => value,]*);
If <count> is ‘0’ then the repeat will continue until the scenario
terminates or until a dispose for the same topic and key. The variable dt
is available for calculating a field value based on time since the repeat was
started. The period indicates the period with which the topic will be sent.
Note that a repeat command by itself does not extend the execution of a
scenario and that when a scenario finishes (i.e. all following instructions
are executed) the repeat instruction is terminated automatically. In such a
case the wait or message instruction can be used to ensure that the repeat
instruction is completed.
6.2.9. Set
The set instruction allows the call of a macro in a table-like fashion.
The command allows a number of static parameters and variable parameters.
The command has the following format:
set <macroname>
([<fieldname>=><value>]*)((<fieldname>*),[(<value>*),]*);
For example, the following set instruction:
set send_and_check_test (
     t => 2)
 ((     x,id),
  (   3.1, 1),
  (  2.34, 2),
  ( 3.678, 3),
  (  6.34, 4),
  ( 99.99, 5))
In this example the send_and_check_test macro is called five times,
all five calls will be made with t = 2 and the values for x and id
as indicated by each row of values. This can be very useful for testing
of translations.
6.2.10. Execute
The execute instruction allows the execution of an application or
command line script on the native OS.
execute [wait] [log] “<instruction>”;
If wait is set then the instruction will wait for the execute to complete.
If log is set then the output of the execute will be logged to the Debug
window (and resulting dump file). When log is used wait should also
be used, to avoid overwriting log messages.
6.2.11. Log
The log instruction logs a message to the Debug window. Log messages can
provide information immediately (e.g. a step being made in a script, or a value
of some variable) or post-execution as part of the logfile which includes the full
content of the Debug window.
log (“message” [optional var]);
6.2.12. Message
The message instruction opens a dialog with the message and allows the
operator to provide feedback and a OK/NOK indication. The feedback plus OK/NOK
indication are logged to the Debug window.
message (“message text” [optional var]);
This instruction is useful for semi-automatic testing of user interfaces where the GUI part is done manually using message instructions.
6.2.13. Fail
The fail instruction fails the execution of the scenario (final result).
The execution terminates.
fail (“message” [optional var]);
The fail instruction can be useful in combination with an if instruction,
for instance when a complex check is executed using javascript.
6.2.14. Call
The call instruction calls a macro or scenario. The name of the macro/scenario
is the filename without extension. Macros must be on the macropath as provided
in the configuration file. The Macrolist window displays all available macros.
Also note that the macro name must be unique throughout all of the available
macros because the path is not part of the selection of a macro (just the
filename without extension).
call <macroname> ([<parametername> => <value>,]*);
6.2.15. Reader
The reader instruction allows the creation or deletion of a reader. When the
keyword dispose is used the reader (if it exists for that topic) will be deleted.
When a reader is created the topicname is mandatory.
reader [dispose] (<topicname> [, <qos> [,<partition>
[,<readername>]]]);
The qos can be provided in short notation (2 or 4 characters):
< v | l | t | p >< b | r >[h][<S|E><D|S>
where
< v | l | t | p >Volatile, local transient, transient or persistent
< b | r >Best effort or reliable
[h]History, for a “keep” of 10 which allows for the reception of 10 samples with the same key in one poll interval
<S|E>Shared or exclusive ownership
<D|S>Ordering based on Destination or Source time stamp
6.3. Instructions for Graphs
6.3.1. Graph
The graph instruction allows manipulation or save of the graph.
It has the following parameters:
X
Y
Key
Color
Title
xUnits
yUnits
save => <name>
show => true|false
reset => true|false
Note that all graphs have the same X component; when omitted the X will be the sample time. If the Y parameter is set, then a new trace is created for the current graph. The X, key, color, title and units are used for this trace if provided.
If reset is true, then the graph is cleared (i.e. all existing traces
are deleted) before creating any new trace. If show is true then the graph
is made visible after adding the trace; when false, then the graph is hidden
after adding the trace. When save is true the graph will be saved to an
image file after the trace has been added.
6.3.2. Column
The column instruction allows the creation of an extra column from a
script for use by the graph instruction.
column [clear] (<fieldname> [, <columnname>]);
When the optional clear is set then the column for the field with name
fieldname will be removed. When columnname is omitted, the columnname
will be the same as the fieldname.
6.4. Instructions for Flow Control
6.4.1. Wait
The wait instruction forces a wait in the execution of the script.
The time is provided in seconds.
wait (<time in seconds>);
Value can be a variable.
6.4.2. If
The if instruction allows conditional execution of instructions.
If (val1 <operator> val2) then
<true instruction list>
[else
<false instruction list>]
endif;
Where <Operator> is one of ‘==’, ‘!=’, ‘>’, ‘<‘, ‘>=’,
‘<=’, ‘||’, ‘&&’.
Expressions can be layered with brackets:
((<<x>0) && (<<y>0))
6.4.3. For
The for instruction allows the execution of a list of instructions
multiple times.
for ,<var> in 1 .. 10 loop
<instruction list which can use <<var>
endloop;
or
for <var> in (a,b,c) loop
<instruction list which can use <<var>
endloop;
6.5. Instructions for the Message Interface
6.5.1. Write
The write instruction writes a message to the interface.
write <interface>.<message> ([<fieldname> => <value>,]*);
6.5.2. Read
The read instruction checks a received message from the interface.
read <interface>.<message> ([<fieldname> => <value>,]*);
6.5.3. Connect
The connect instruction calls the connect of the interface.
The functionality depends on the implementation in the interface.
connect <interface>;
6.5.4. Disconnect
The disconnect instruction calls the disconnect of the interface.
The functionality depends on the implementation in the interface.
disconnect <interface>;
6.5.5. Control
The control instruction allows the execution of special instructions
as provided by the interface.
control <interface>.<instruction>[ ([<fieldname> => <value>,]*)];
6.6. Installing Script Engines
In order to use additional script languages the appropriate script engines
must be added to the Java classpath. The Java JRE already comes with
a JavaScript engine by default (i.e. no specific installation is required).
More Java script engines are available and can be used to support different
scripting languages for the embedded scripts inside the scenario scripts,
or for the additional fields.
When Tester starts, the available script engines will be logged
(default log file is /tmp/OSPLTEST.log).
6.6.1. Jython
Download and install Jython on the target machine. Include jython.jar,
which is normally located in the Jython installation directory, in the
classpath of the OpenSplice Tester. Use this language by adding the
following line as the first line of each script using the Jython
script language:
#!jython
6.6.2. Jruby
Download and install Jruby on the target machine. Include jruby.jar,
which is normally located in the lib directory in the Jruby installation,
in the classpath of the OpenSplice Tester. Use this language by adding
the following line as the first line of each script using the Jruby
script language:
#!jruby
6.6.3. Groovy
Download and install Groovy on the target machine. Include
groovy-all-<version>.jar, which is normally located in the
embeddable directory in the Groovy installation, in the
classpath of the OpenSplice Tester. Use this language by adding
the following line as the first line of each script using
the Groovy script language:
#!groovy